Ingredients:
½ teaspoon Ground Ginger
½ teaspoon Allspice
½ teaspoon Cinnamon
½ teaspoon Nutmeg
½ cup light or dark Brown Sugar
½ cup Granulated Sugar
1 teaspoon Vanilla extract
½ cup Coconut oil
Materials:
Mixing Bowl
Small Jar
Spoon
Instructions:
- Put all of the dry ingredients in the mixing bowl and stir with the spoon.
- Add the vanilla and coconut oil and mix. Mixing with your hands is recommended.
- Once the texture of the mixture is consistent throughout, pour into a small jar.
- Tie a small ribbon around jar to add decoration.
- Smell, use and enjoy!
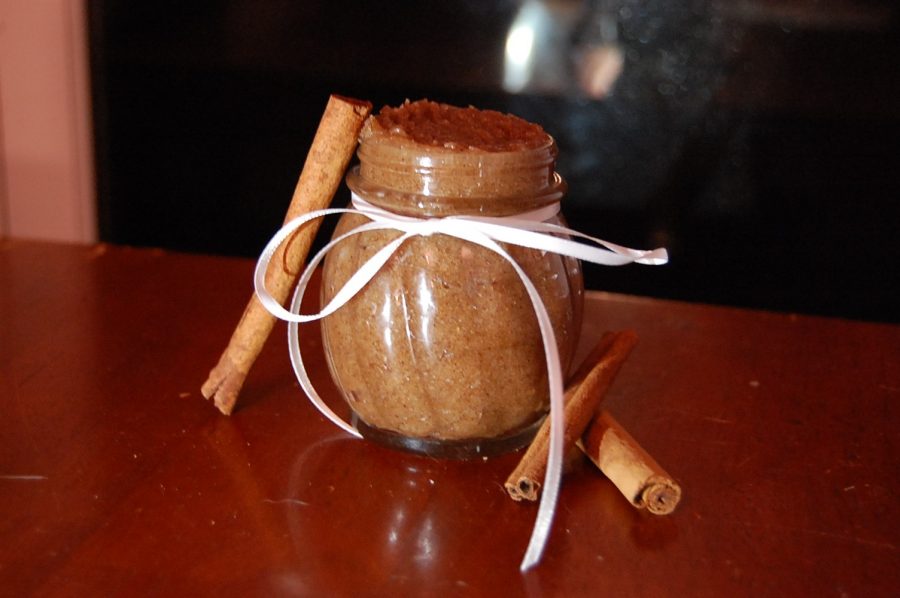
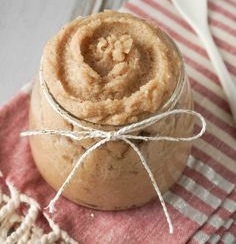
As the holiday season is now in full swing, my house is constantly filled with the smell of pine and peppermint, so why not add to the wonderful aroma and make a gingerbread body scrub? First, I put all of my dry ingredients in a bowl and mixed them and then added the vanilla and coconut oil. All of the ingredients needed for the body scrub can be found in the pantry, requiring no need for a visit to the grocery store and making this recipe even more uncomplicated. I didn’t know what utensil would be best to mix the ingredients with the coconut oil, so I gave my hands a good washing and mixed it the old fashioned way; using my hands. The final product turned out great, except for the fact that the coconut oil was almost impossible to get off of your hands. The body scrub smelled magnificent and reminded me of building gingerbread houses years ago. The texture of the body scrub was so smooth and it spreads cleanly on your hands and body. Overall, I would recommend this body scrub because it provides the perfect scent for the winter season, along with a moisturizing texture.
Ornaments
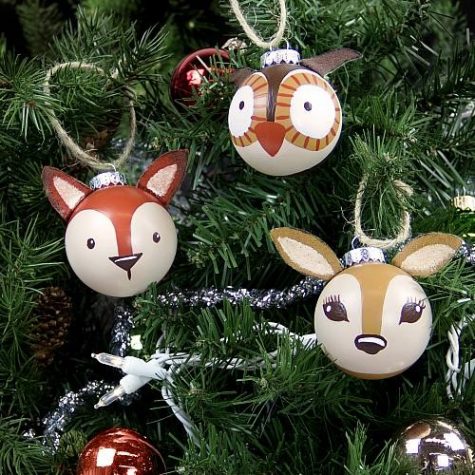

It’d be an understatement to say that I underestimated the necessity of artistic talent in this DIY. You see a simple deer painted on an ornament and think, “yeah, I can do that.” But I’m here to advise you to think carefully about that assumption. According to my calculations, this DIY takes two hours, a gallon of spilled glitter and a good ounce of determination to complete. The only reason this takes so long is because of the drying time involved with working with paints. I wouldn’t recommend this DIY to someone just looking for an easy project. This is more of a project for an artist decorating their Christmas tree.
3D snowflake
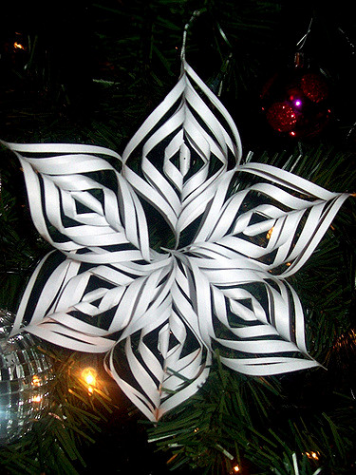
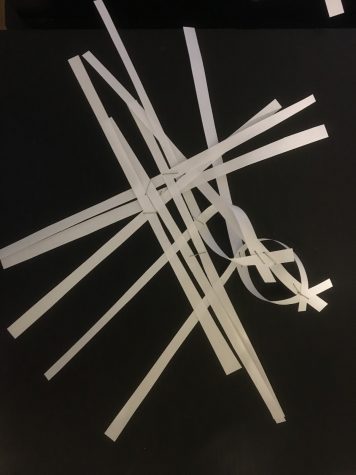
I’ve never in my life been as frustrated as I was making (or failing to make) this snowflake. From the computer screen, this just looked like it’d require just wrapping strips of paper together. Boy was I wrong. First off, it’s incredibly difficult to cut twenty identical, centimeter-wide strips of paper. The papers in the tutorial were almost mocking me as I slaved over each crooked piece. I eventually gave up on perfection and tried to arrange my subpar papers in some semblance of the pattern in the tutorial. I could lay them out just fine, but the second I began to form the 3D shape, everything just fell apart. I moved one strip and suddenly I was staring at a mangled explosion of paper-one even ended up in my shoe somehow. Now I don’t want anyone to think that I gave up easy. No, I worked for around an hour to get those ridiculous strips into some kind of snowflake to no avail. All I can say is, anyone who could actually manage this DIY is inhuman and should be doing better things with their skills. Please accept this as my humble surrender from the world of paper crafting.
Hot glue snowflake
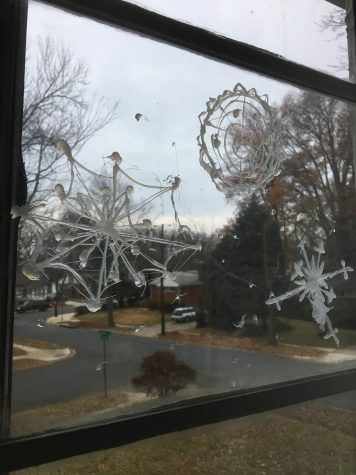
This is perhaps the cutest, easiest winter DIY there is. There are only two steps, beginning with making hot glue designs on parchment paper. The last step is to put a dot of glue on your window and use it to stick the previously made snowflake. The finished flakes, which can look like anything you can imagine, are picture perfect frosty decals for your window. It takes no time at all to do this project. So little that I thought I missed something, and it turns out exactly as advertised! My only reservation in praising this DIY is that it was difficult to control the glue when drawing the flakes, so the final product may end up looking more like a spiderweb than a snowflake. To stop the messy look, don’t press the gun down too hard when drawing, and pull of the stringy pieces of glue before hanging your flake. Decorating with these time savers allows for more time spent drinking cocoa this holiday season, so go out and get your DIY on!
Sharpie Mug Design
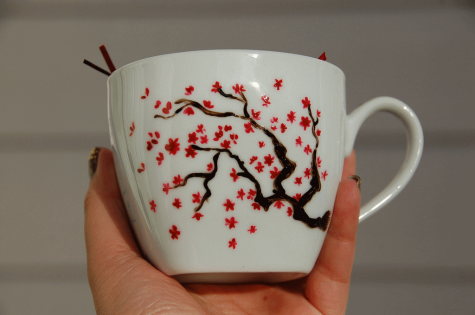
For as long as I can remember, Christmas has been my favorite time of the year and for many families, one of the best moments in December is decorating the house for the holidays. This year, I decided to try to make something crafty and artistic for Christmas. Although I’m not particular skilled in either of these areas, I was optimistic with this DIY, which promised “no artistic skills needed.” I only needed a mug, sharpies, scissors, paper and tape.
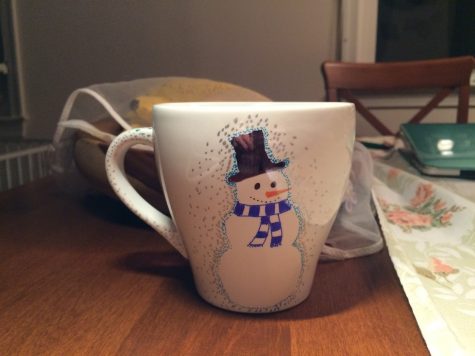
First of all, I outlined the handle in a paper, folded it and cut it resulting in a heart. The shape of my mug was curvier than the one in the picture, which made me struggle to reproduce the first step. I would advise you to use a more symmetrical mug for better results. After a few tries, I taped the heart on the mug in a way that half would cover the handle and started to draw. Doing the dots in dégradé was not difficult, but it needs to be done slowly, steady and with patience. To avoid any mistakes, you’ll have to hold on to the temptation of speeding up. I spent a good fifteen minutes carefully plotting the circles, holding the cup by my chin and barely moving to not mess it up but I was very happy with the final result. It didn’t quite look like a heart, but it was more due to the type of mug than the project itself.
Don’t be afraid of being creative and working on more challenging drawings. I decided to decorate the rest of the cup with a snowman. I printed its silhouette, taped it and surrounded it with blue and silver dots. After I had started to draw the hat, I feared that it would be a little bit too much, but the results were lovely and festive and I only loved it more.